mac怎么不用
U盘安装双系统?虽然mac默认是自己加的mac os,不过苹果
电脑很人性化,提供BootCamp助理帮助安装windows组成双系统。现在新版本的macbook支持不用U盘安装双系统,不得不给苹果赞一个!那么mac不用U盘怎么装双系统呢?下面小编跟大家分享mac不用U盘装windows双系统的方法。
用户须知:如果是2014年之前的机型需要U盘制作启动盘,2014年之后机型支持不用U盘直接安装Windows双系统,本文介绍的是新款macbook,不需要U盘。
2014之前的旧机型(需要u盘):苹果mac笔记本怎么装win10双系统
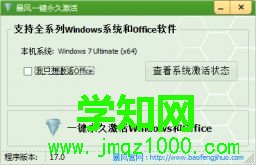
暴风
激活工具v17.0绿色版下载(暴风win10一键永久激活工具) 暴风激活工具能够帮助用户自动永久激活windows系统以及
html' target='_blank'>
office办公软件,暴风win10激活工具v17.0是专门为激活
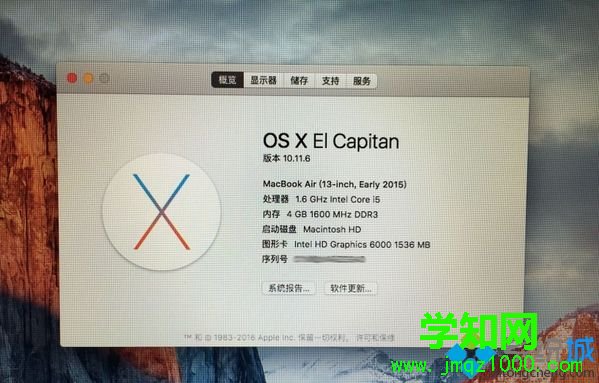
win10系统而生,相对于其他win10 KMS激活工具来说,操作更简单,一键激活无需复杂操作,简单暴力。适用于激活win7,win8,win8.1,win10全系列系统。 一、安装环境及系统下载 1、Macbook 2015版 2、系统为OS X EI Capitan 10.11.6 3、事先下载好win10原版系统
iso镜像下载:
windows10 1809十月版更新官方下载地址
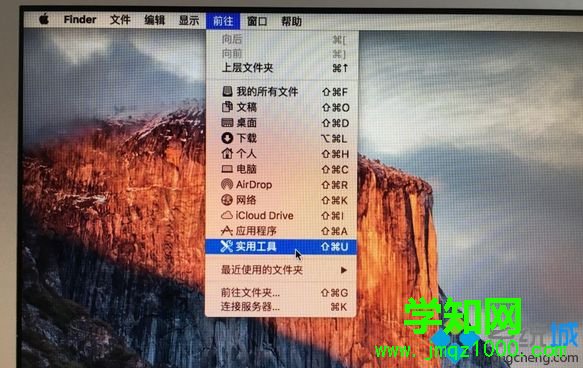
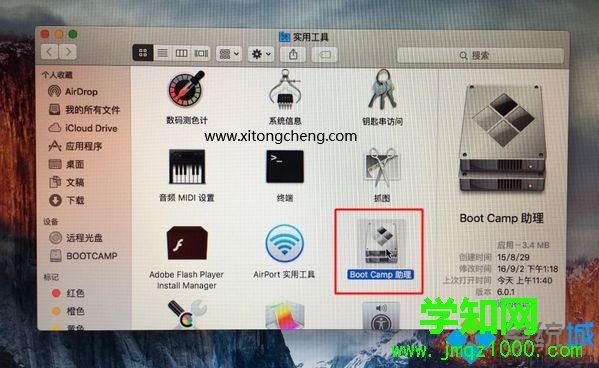
二、mac不用u盘安装双系统步骤如下 1、在桌面顶部点击【前往】—【实用工具】;
2、在实用工具中打开【Boot Camp助理】;
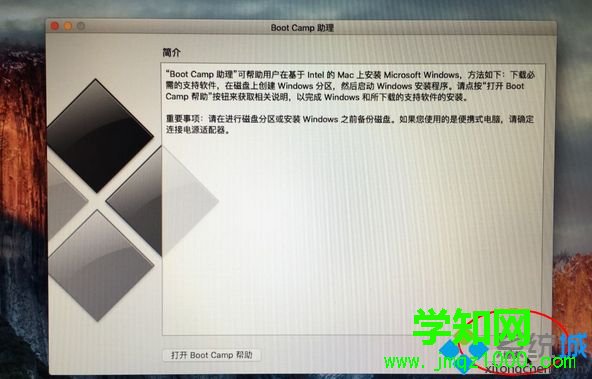
3、打开Boot Camp助理,点击右下角继续;
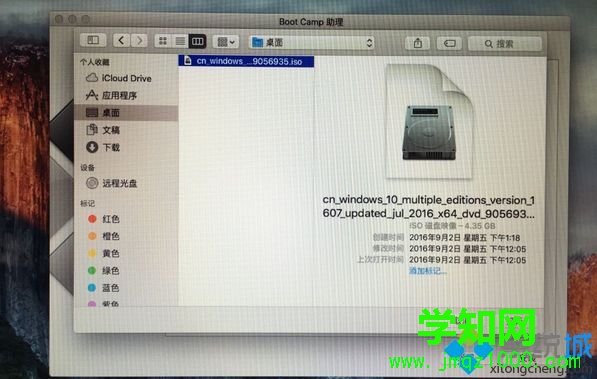
4、ISO映像这边,点击【选取】选择windows10 iso文件位置,windows10原版iso镜像要事先准备好,选好之后,点击打开;
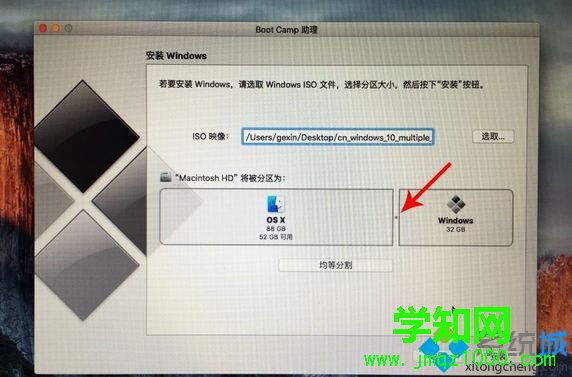
5、接着是分区,分出来一个区给windows系统,用鼠标拖动中间小圆点划分两个分区的大小,一般需要30G以上,具体看你的硬盘大小,分区之后,点击安装;
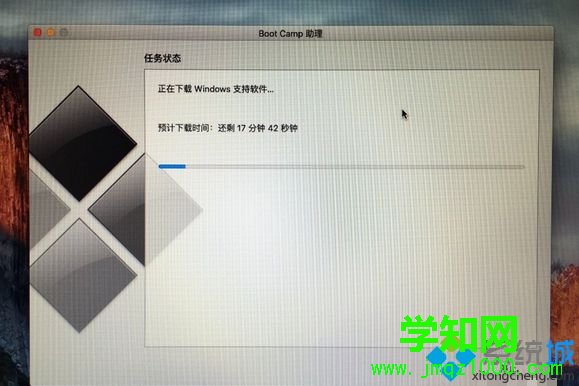
6、这时候Boot Camp助理会下载windows支持软件,执行磁盘分区操作,预计时间可能15-20分钟;
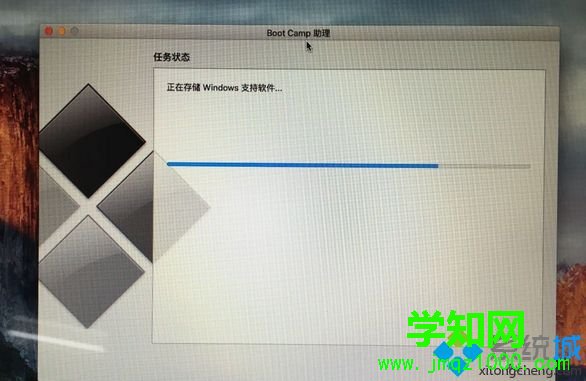
7、正在存储windows支持软件,等待进度条完成;
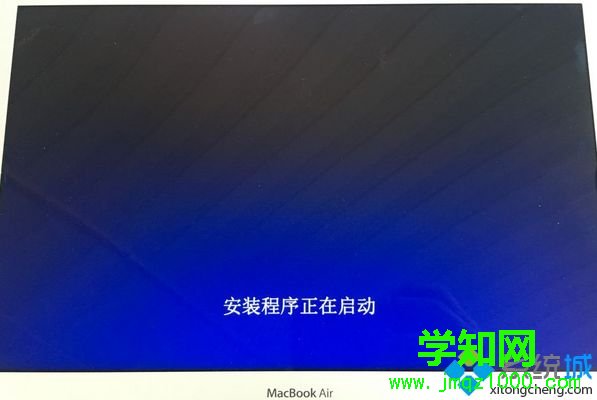
8、之后会启动进入windows安装程序;
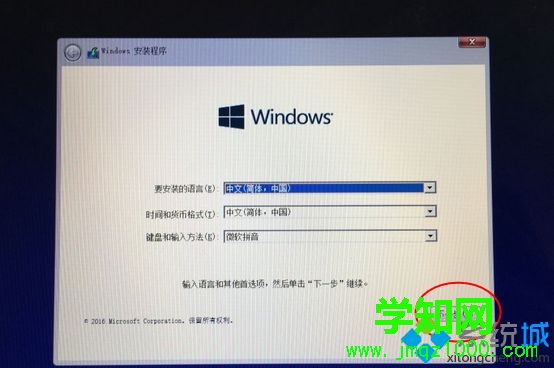
9、安装语言、时间、键盘一般不用改,点击下一步;
10、密钥这边,点击【我没有产品密钥】;

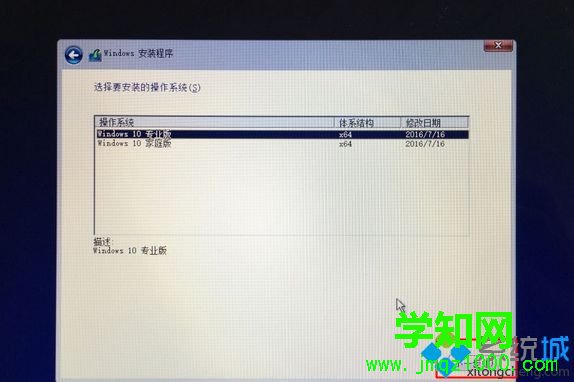
11、选择要安装的win10版本,专业版或家庭版,选择之后,点击下一步;
12、选中【BOOTCAMP】这个分区,记住它的分区编号是分区5,点击【格式化】;
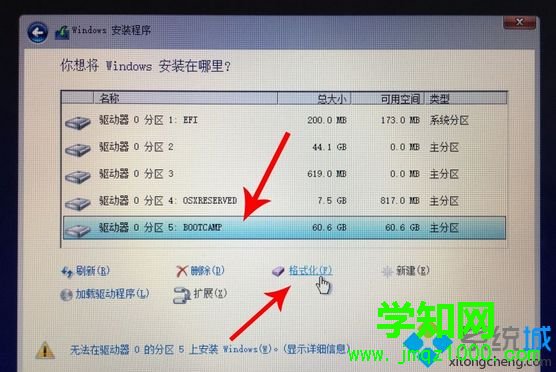
13、格式化之后,继续选中这个分区5,点击下一步;

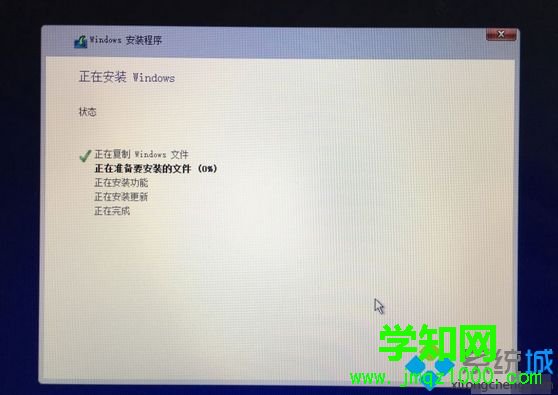
14、开始安装windows10系统,等待即可;
15、经过一段时间安装之后,安装完成,可以选择自定义,也可以使用快速设置;
郑重声明:本文版权归原作者所有,转载文章仅为传播更多信息之目的,如作者信息标记有误,请第一时间联系我们修改或删除,多谢。