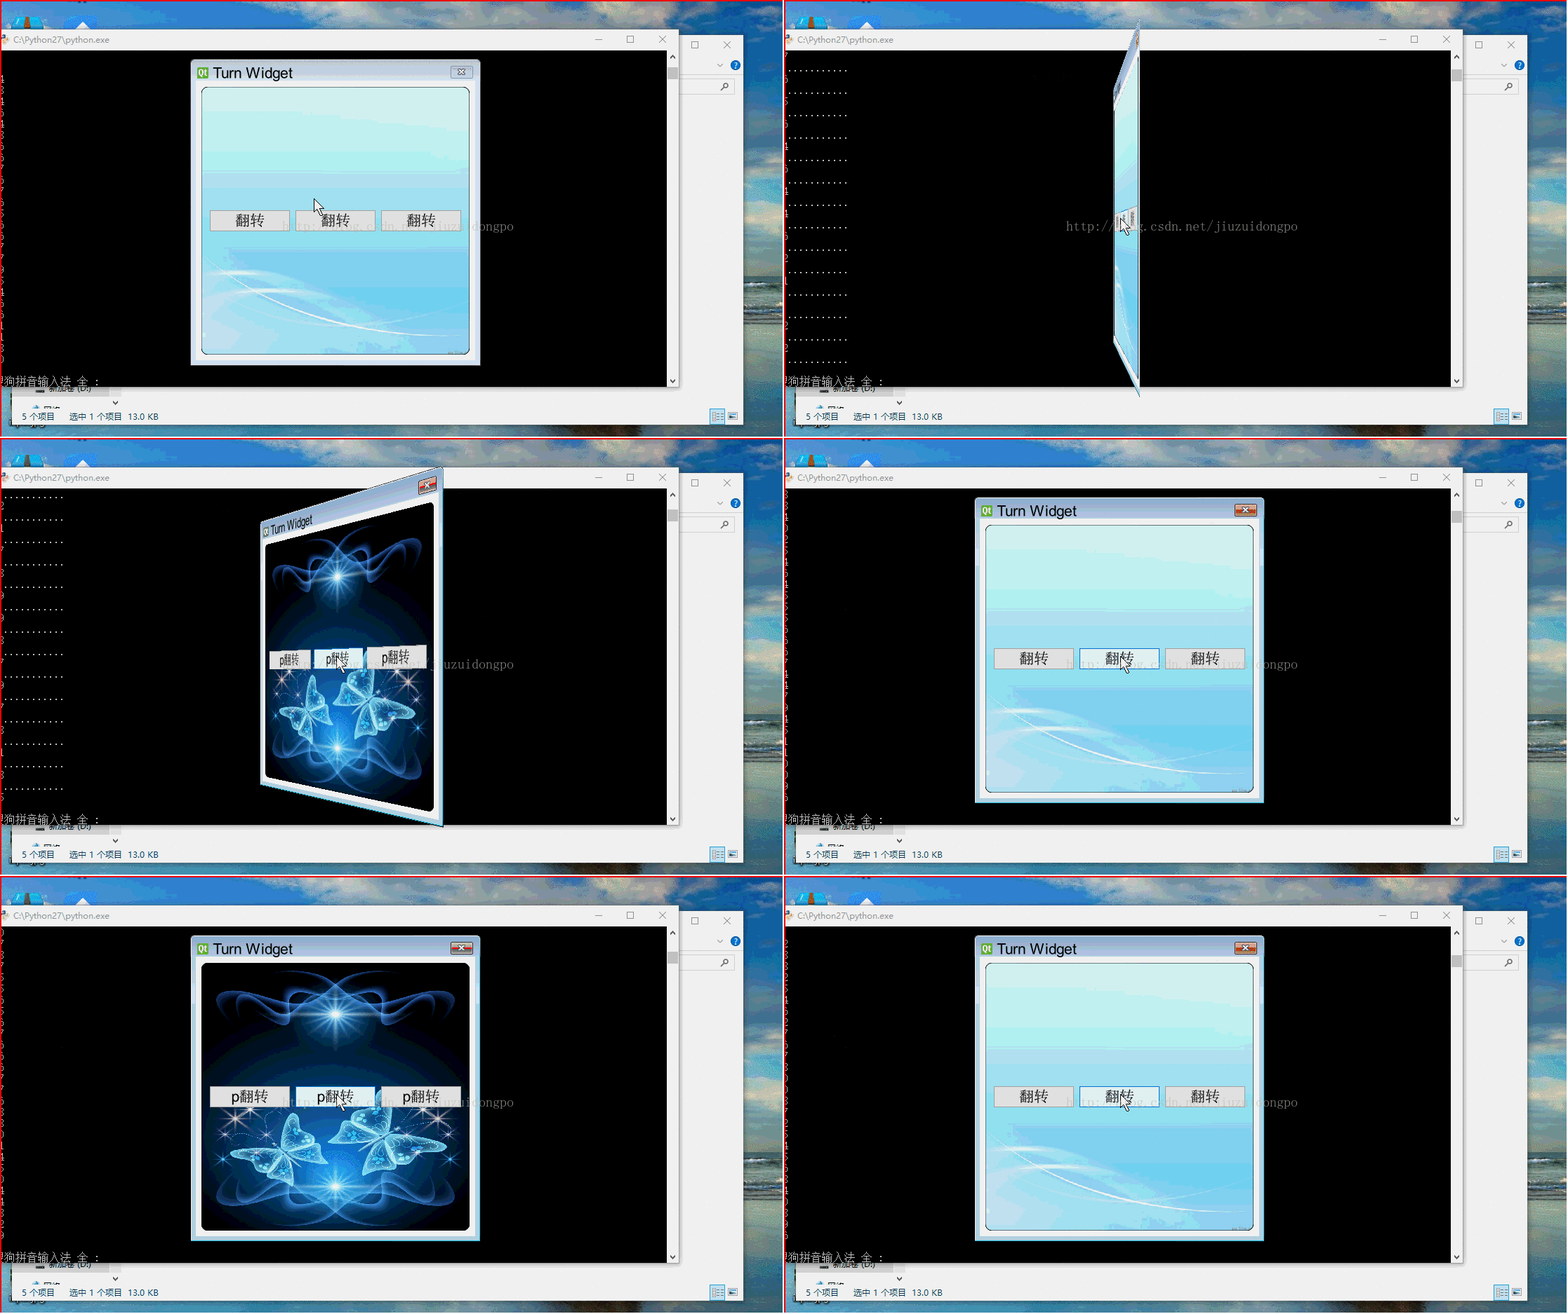
PyQt实现界面翻转切换效果是用qt的场景功能来实现的,用到了QGraphicsView,QGraphicsLinearLayout,QGraphicsWidget等有关qt场景的库。算是对qt场景的一个小小的尝试,涉及内容不深,程序效果并是随心所欲,需要去进一步的改善和提高。暂且先把代码贴在此处,供大家学习和指正。
工程包括四个类:
界面A,TestMainWindow,用来充当翻转效果的A面。
界面B,TestMainWindowTwo,用来充当翻转效果的B面。
绘图界面:TestGraphicWidget,用来绘制界面A和B。
主界面:MainWindow,是一个全屏的透明窗口,是整个效果展现的总舞台,内部包含一个QGraphicsScene和一个QGraphicsView,用来展示效果中的界面翻转和界面替换。

整个效果的原理总结为几点:
首先,将整个效果需要的所有界面添加到TestGraphicWidget中,在将TestGraphicWidget放入到QGraphicsScene中,然后经QGraphicsScene添加到主界面中。
然后,界面切换实现,两个函数,非常简单,要显示A,就把B移除并隐藏,要显示B,则把A移除并隐藏。
def setOne(self): self.twoWidget.hide() self.oneWidget.show() self.layout.removeItem(self.twoTestWidget) self.layout.addItem(self.oneTestWidget) self.view.update() def setTwo(self): self.oneWidget.hide() self.twoWidget.show() self.layout.removeItem(self.oneTestWidget) self.layout.addItem(self.twoTestWidget) self.view.update()
然后是最重要的,翻转效果的实现,用的是TestGraphicWidget特有的翻转方法,参数可以根据实景情况调整。
def transeformR(self,count): r = self.form.boundingRect() for i in range(1,count): self.form.setTransform(QTransform() .translate(r.width() / 2, r.height() / 2) .rotate(91.00/count*i - 360 * 1, Qt.YAxis) .translate(-r.width() / 2, -r.height() / 2)) self.waitMethod() self.view.update() self.form.setTransform(QTransform() .translate(r.width() / 2, r.height() / 2) .rotate(270 - 360 * 1, Qt.YAxis) .translate(-r.width() / 2, -r.height() / 2)) self.view.update() if self.formflag %2 == 0: self.setOne() else: self.setTwo() for i in range(1,count): self.form.setTransform(QTransform() .translate(r.width() / 2, r.height() / 2) .rotate(270 + 93.00/count*i - 360 * 1, Qt.YAxis) .translate(-r.width() / 2, -r.height() / 2)) self.waitMethod() self.view.update()
而且提供了两种让程序等待但界面不会卡死的方法:
def sleep(self,msec): dieTime = QTime.currentTime().addMSecs(msec) print dieTime,QTime.currentTime() #a = 0 while( QTime.currentTime() < dieTime ): #print "000000000000" QCoreApplication.processEvents(QEventLoop.AllEvents, 100) def waitMethod(self): tt = QElapsedTimer() tt.start() q = QEventLoop() t = QTimer() t.setSingleShot(True) self.connect(t, SIGNAL("timeout()"), q.quit) t.start(1) # 5s timeout q.exec_() if(t.isActive()): t.stop() else: pass print tt.elapsed()
新闻热点
疑难解答