本文介绍了nginx+keepalived 高可用主从配置详解,分享给大家,具体如下:
一、系统环境及软件版本
CentOS 6.6 x64
keepalived-1.2.18.tar.gz
nginx-1.6.2.tar.gz
主服务器:192.168.38.64
从服务器:192.168.38.66
VIP :192.168.38.100
二、nginx安装 (主从安装一致)
1.安装依赖环境
复制代码 代码如下:yum install gcc gcc-c++ make automake autoconf libtool pcre pcre-devel zlib zlib-developenssl openssl-devel
2.上传nginx到 opt 目录
3.解压安装
# tar -zxvf nginx-1.6.2.tar.gz # cd nginx-1.6.2 # ./configure --prefix=/opt/nginx (prefix=/opt/nginx 这个指定的是 nginx目录) # make && make install
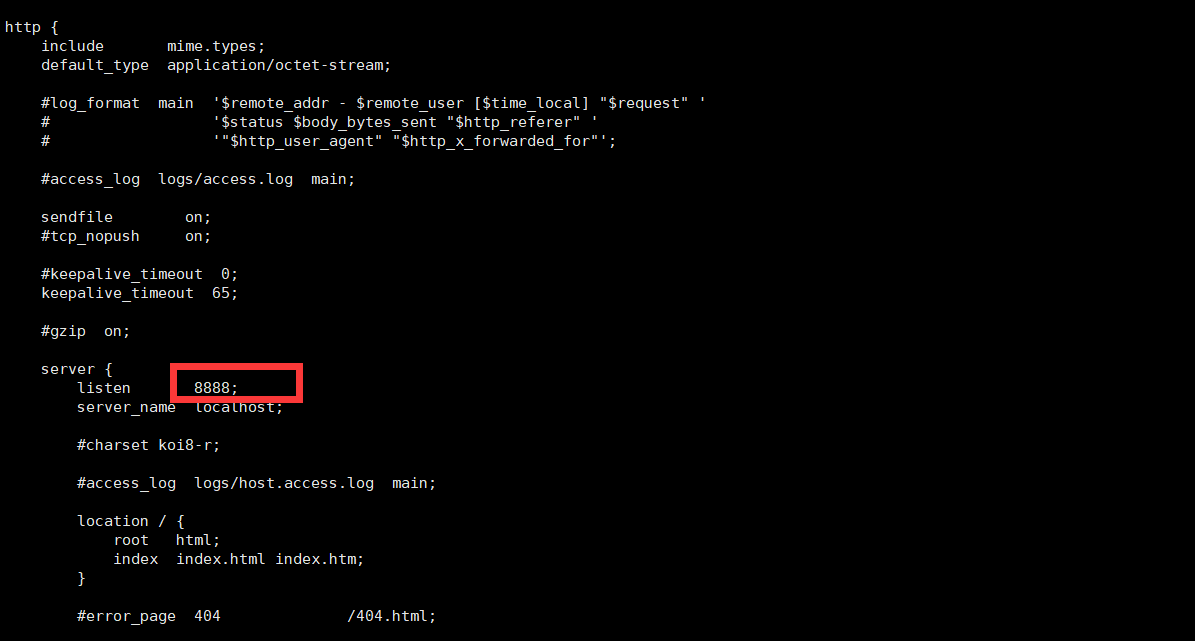
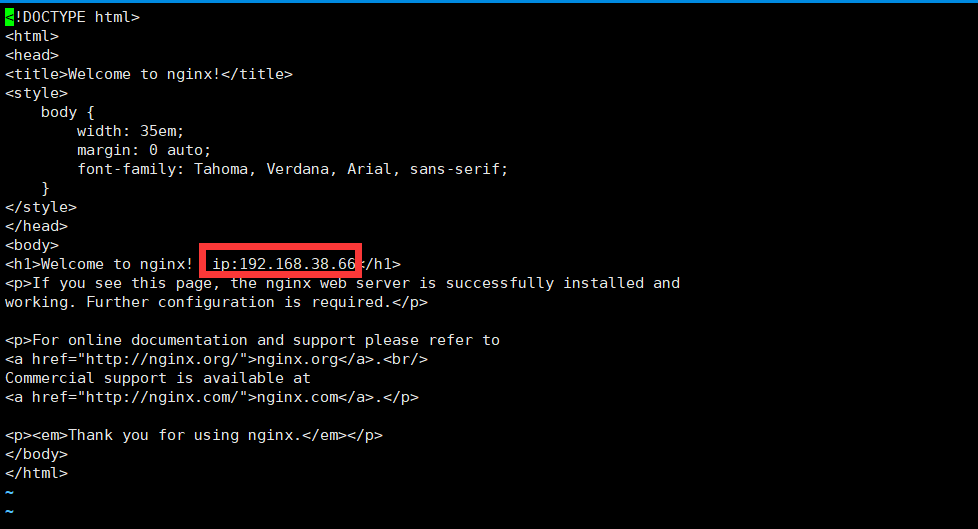
4.修改 nginx监听端口 及 index.html
# vi /opt/nginx/conf/nginx.conf

vi /opt/nginx/html/index.html

5. nginx 启动及常用命令
配置测试: /opt/nginx/sbin/nginx -t 出现如下界面说明配置没问题

启动 : /opt/nginx/sbin/nginx
重启 : /opt/nginx/sbin/nginx -s reload
停止 : /opt/nginx/sbin/nginx -s stop
6.开机启动 nginx
vi /etc/rc.local
加入: /opt/nginx/sbin/nginx
7.修改防火墙开放端口
vi /etc/sysconfig/iptables
添加 : -A INPUT -p tcp -m state --state NEW -m tcp --dport 8888 -j ACCEPT
重启防火墙 : service iptables restart
8.问题
启动 nginx遇到的问题

vi /etc/ld.so.conf
添加: /opt/nginx/lib/
9.nginx的负载均衡
nginx的负载均衡主要是 由upstream 这一模块完成
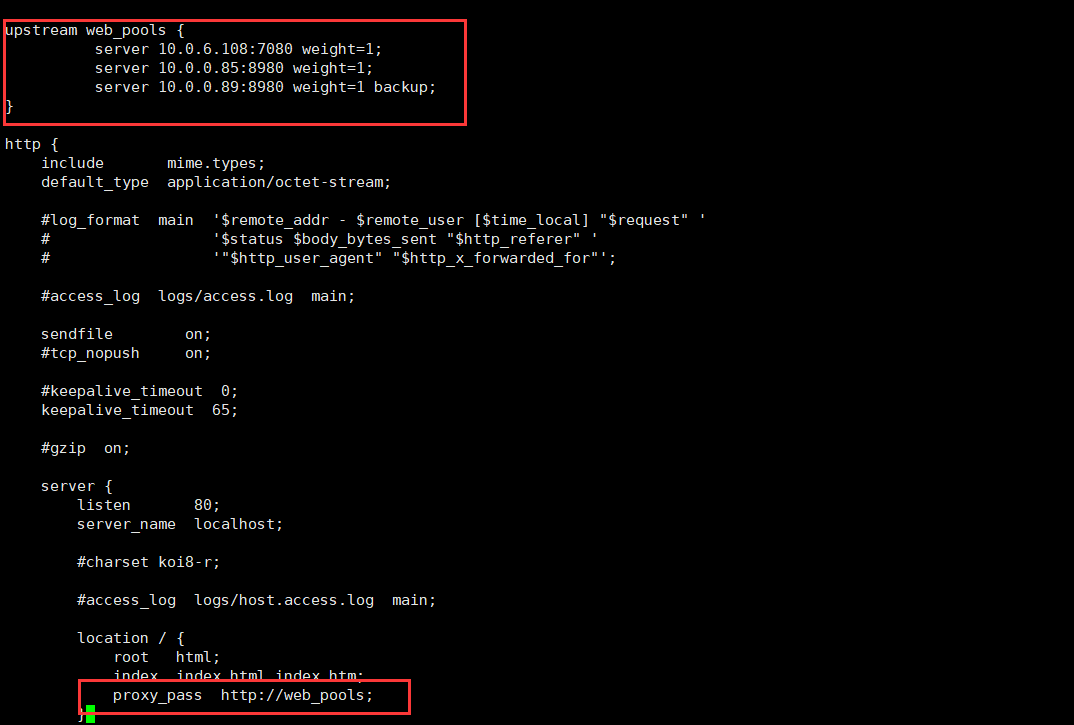
修改 nginx的配置文件
vi /data/nginx/conf/nginx.conf
添加如下内容:(web_pools 这个名称可变)
upstream web_pools { server 10.0.6.108:7080weight=1; server 10.0.0.85:8980weight=1; }将server节点下的location节点中的proxy_pass配置为:http:// + upstream名称即可
结果如下:

其中 weight是权重 backup是备用服务器 ,只有其它服务器宕机后,备用服务器才会启动。
三、keepalived 安装
1.keepalived上传到 opt目录下
2.解压 安装
tar -zxvf keepalived-1.2.18.tar.gz cd keepalived-1.2.18 ./configure --prefix=/opt/keepalived make && make install
3.将keepalived 安装成 linux服务
新闻热点
疑难解答