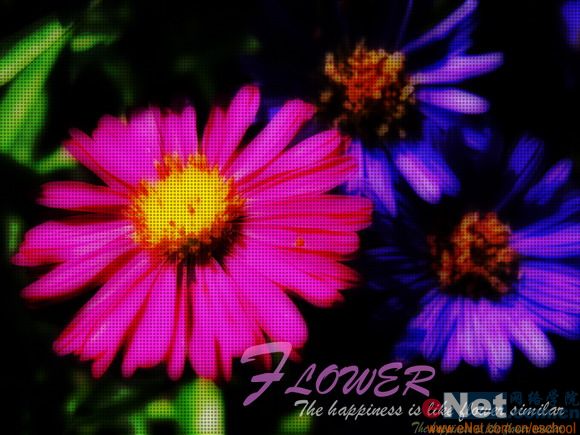
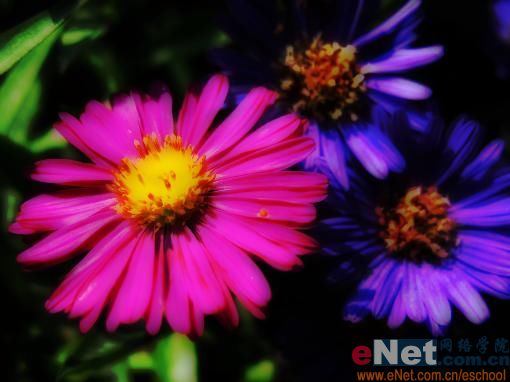
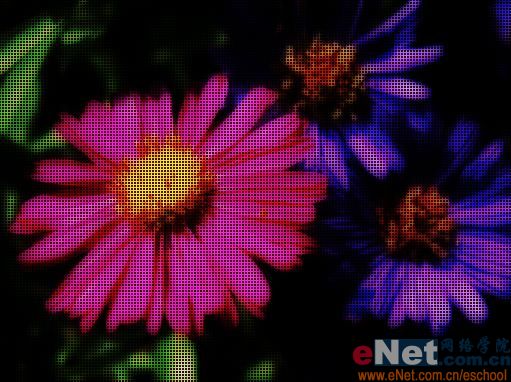
先看一下最终效果:
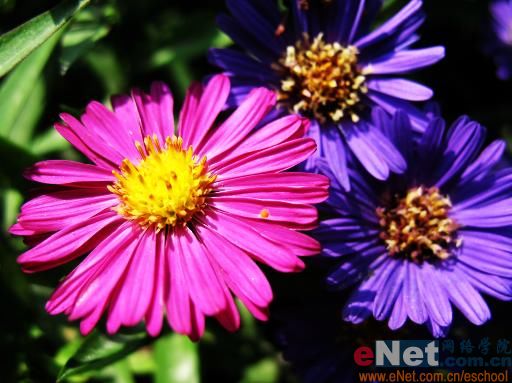
素材:

|||
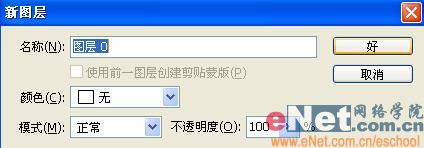
打开素材图片,双击图层面板中的背景图层,在弹出的新建图层对话框中保持默认参数,单击确定按钮,将背景转换为一般图层。
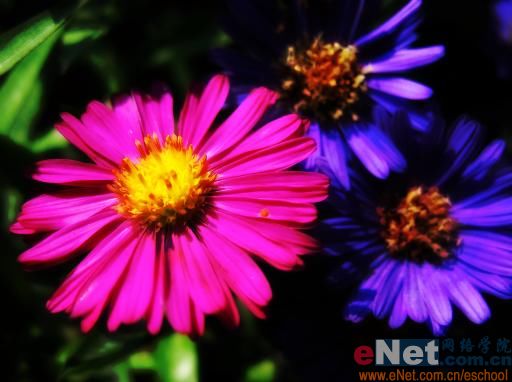
复制图层0为图层0副本。设置图层0副本图层的混合模式为“叠加”,图像效果如所示。
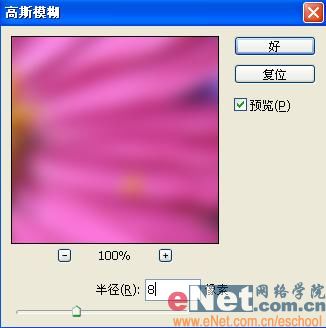
选择图层0,执行菜单栏中的“滤镜”“模糊”“高斯模糊”命令,在弹出的高斯模糊对话框中设置半径为8像素。
|||

新建图层1,按d键,将前景色和背景色设置为默认的黑色与白色,接着执行菜单栏中的“滤镜”“渲染”“云彩”命令。
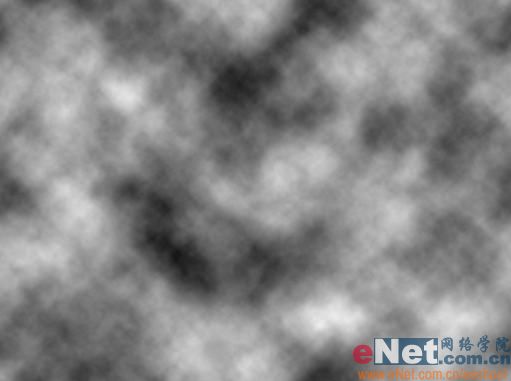
设置图层1的图层混合模式为“颜色加深”,不透明度为65%。
|||
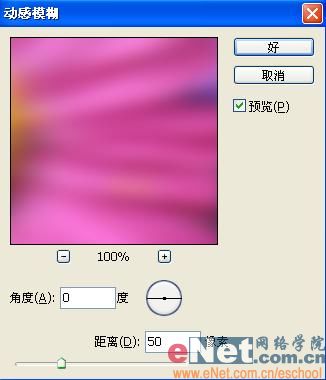
分别复制图层0和图层0副本,得到图层0副本2和图层0副本3。选择图层0副本2执行菜单栏中的“滤镜”“模糊”“动感模糊”命令,在弹出的动感模糊对话框中,设置角度为0,距离为50像素,。
设置图层0副本2的图层混合模式为“变暗。
|||
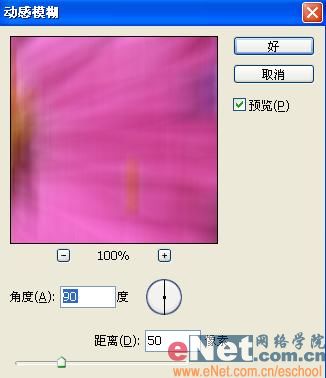
选择图层0副本3,执行菜单栏中的“滤镜”“模糊”“动感模糊”命令,在弹出的动感模糊对话框中设置角度为90度,距离为50像素。

设置图层0副本3的图层混合模式为“叠加。

|||
新建一个宽度和高度分别为6像素,分辨率为350的文件,然后放大文件。选择工具箱中的“矩形选框工具”,在属性栏中设置样式为“固定大小”,设置宽度和高度分别为4,在图像上单击建立选区。
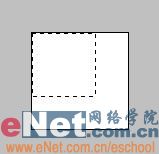
设置前景色的rgb分别为65、11、15,填充选区。
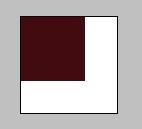
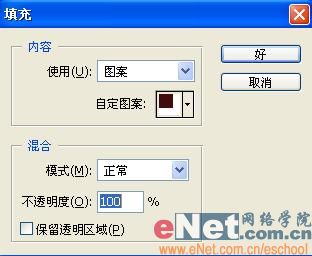
执行菜单栏中的“编辑”“定义图案”命令,在弹出的对话框中单击确定。在图层面板中新建图层2,执行菜单栏中的“编辑”“填充”命令,弹出填充对话框。
 |||
||| 设置图层2的图层混合模式为“正片叠底”图像效果如图18所示,不透明度设置为40%,图像效果如图所示。
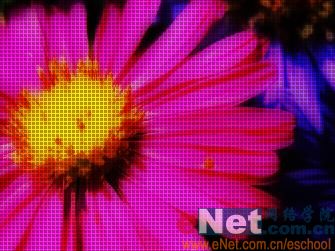
设置图层2的图层混合模式为“正片叠底”,不透明度设置为40%。