第一步 : 不管是 apache 还是 nginx ,想要隐藏 Index.php 文件,需要打开 urlManager 组件的配置,在进行后续的操作
[‘components' => [ 'urlManager' => [ 'enablePrettyUrl' => true,//开启美化URL 'showScriptName' => false,//是否显示脚本名称:index.php,同时应该配置 Web 服务 'enableStrictParsing' => false,//是否开启严格解析 //'suffix' => '.html',//生成带 .html 后缀的 URL 'rules' => [ ], ],],]
第二步 :
nginx 下 :
配置文件 nginx.conf 内容如下 :
user centos;worker_processes 4; error_log logs/error.log; pid logs/nginx.pid; events { worker_connections 10240;} http { include mime.types; default_type application/octet-stream; log_format main '$remote_addr - $remote_user [$time_local] "$request" ' '$status $body_bytes_sent "$http_referer" ' '"$http_user_agent" "$http_x_forwarded_for"'; log_format log_json '{ "@timestamp": "$time_local", ' '"remote_addr": "$remote_addr", ' '"referer": "$http_referer", ' '"request": "$request", ' '"status": $status, ' '"bytes": $body_bytes_sent, ' '"agent": "$http_user_agent", ' '"x_forwarded": "$http_x_forwarded_for", ' '"up_addr": "$upstream_addr",' '"up_host": "$upstream_http_host",' '"up_resp_time": "$upstream_response_time",' '"request_time": "$request_time"' ' }'; access_log logs/access.log; sendfile on; #tcp_nopush on; #keepalive_timeout 0; keepalive_timeout 200; client_max_body_size 200M; gzip on; include vhost/*.conf;}项目域名的配置整体是放在 vhost 这个目录下面,改目录下其中一个文件的内容
server { listen 80; server_name 域名; # 项目 index.php 地址 root /home/centos/www/youdai-api/bird/web; access_log logs/youdaiApi.access.log log_json; error_log logs/youdaiApi.error.log; location / { try_files $uri $uri/ /index.php?$args; index index.php; } location ~ /.php$ { fastcgi_pass 127.0.0.1:9000; fastcgi_index index.php; fastcgi_param SCRIPT_FILENAME $document_root$fastcgi_script_name; include fastcgi_params; } location ~ //.ht { deny all; }}apche 下 : 伪静态配置
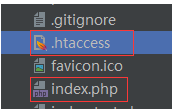
入口文件的同级目录下,放置 .htaccess 文件

内容如下 :
RewriteEngine onRewriteCond %{REQUEST_FILENAME} !-dRewriteCond %{REQUEST_FILENAME} !-fRewriteRule ^(.*)$ index.php?/$1 [QSA,PT,L]以上就是本文的全部内容,希望对大家的学习有所帮助,也希望大家多多支持错新站长站。
新闻热点
疑难解答