PHP Support in Windows Azure
在Windows Azure中,开发者可将PHP放置于两种服务中,一个是Web Sites,另一个则是Cloud Services,两者的差异是Web Sites无法使用memcached及较少的Scaling支持,Cloud Services虽然支持这些,
但相对的在开发及部署上也较为麻烦些,本文就针对Cloud Services上的PHP开发及部署做一个介绍。
First PHP Web Application
要在Cloud Services上使用PHP,开发者必须先下载Windows Azure SDK for PHP。
http://www.windowsazure.com/en-us/develop/php/common-tasks/download-php-sdk/
由于PHP可在多种平台上开发,因此Microsoft也提供了Mac/Linux的版本,本文先就Windows版本介绍,之后的文章会补充Mac及Linux版本的工具介绍。
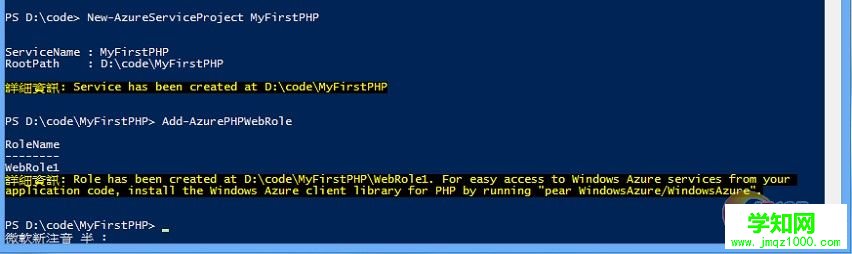
安装完成后,请开启Windows Azure Powershell键入以下命令来建立第一个Windows Azure PHPhtml' target='_blank'>应用程序。
图1
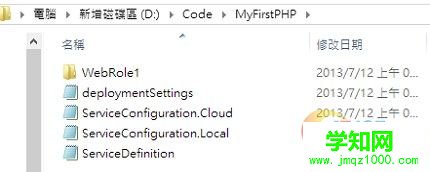
完成后会得到以下的目录结构。
图2
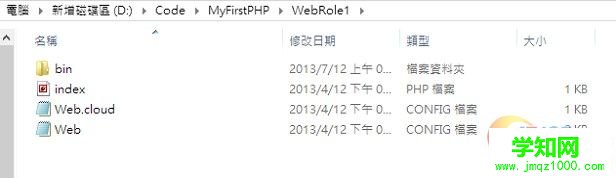
请将你的PHP档案放在WebRole1目录下,例如下图。
图3
预设,Windows Azure Powershell会产生一个简单的index.php,因此你可以直接执行Start-AzureEmulator来进行本机的测试。
图4
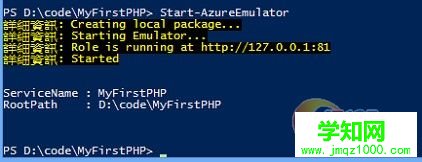
一切无误的话,应该可以开启浏览器来查看。
图5
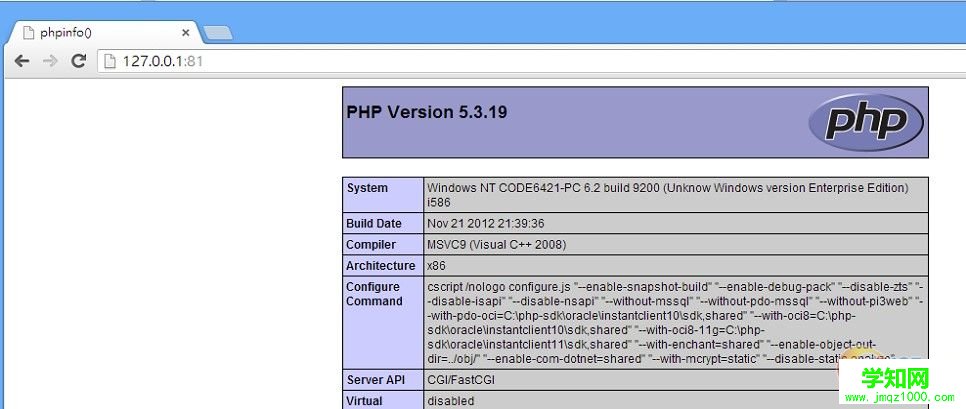
很简单吧,最后只要透过Publish-AzureServiceProject就可以部署到真实的Azure环境中,在这之前,你必须先取得与你的Azure账号连结的凭证档案,请使用Windows AzurePowershell下达以下命令。
图6
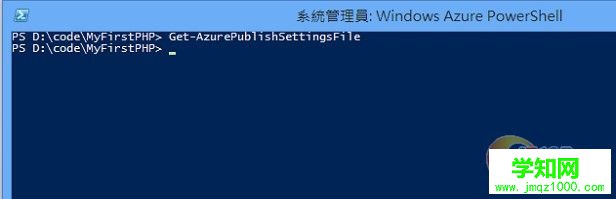
这会开启一个浏览器进入Windows Azure的入口网站,请登入你的账号后,便会提示下载需要的凭证档案,请将其存在找得到的地方。
图7

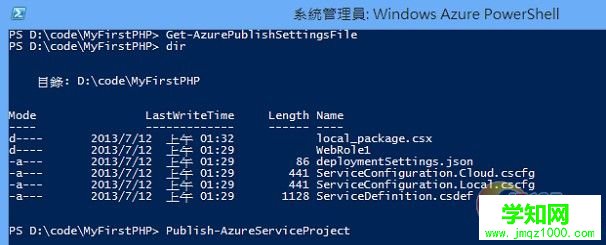
完成后透过Windows Azure Powerhsll下达以下命令。
图8

完成后就可以切换到MyFirstPHP目录来进行Publish了。
图9
部署的动作是先建立对应的Cloud Service(以此项目的目录名称),然后建立对应的Storage Account(以此项目的目录名称)来部署,如果你需要调整这些的话,可以透过deploymentSettings.json档案来自订。
deploymentSettings.json
{"Slot":"","Location":"","Subscription":"","StorageServiceName":"","AffinityGroup":""}
Slot指的是要部署到Cloud Services的哪个Slot,有Staging跟Production两个选项,Location则是Service所在的区域,有East Asia、East US等选项。
StorageServiceName则是告诉Windows Azure Powershell要使用哪个Storage Account来存放部署期间的档案,请直接键入名称,如果该Storage Account不存在时,Windows Azure Powershell会新建一个。
Access Windows Azure Storage Services
当然,在PHP中也可以存取Windows Azure Storage Services,但安装Client Library的过程有点复杂,首先你得先安装Git。
http://git-scm.com/book/en/Getting-Started-Installing-Git
然后在MyFirstPHP目录中建立一个composer.json档案。
Composer.json { "require": { "microsoft/windowsazure": "*" }, "repositories": [ { "type": "pear", "url": "http://pear.php.net" } ], "minimum-stability": "dev"} 接着下载compposer.phar,存放到MyFirstPHP目录下。
http://getcomposer.org/composer.phar
然后在MyFirstPHP目录下达以下命令。
php ./composer.phar install
一切无误的话,应该可以看到类似下图的画面。
图10
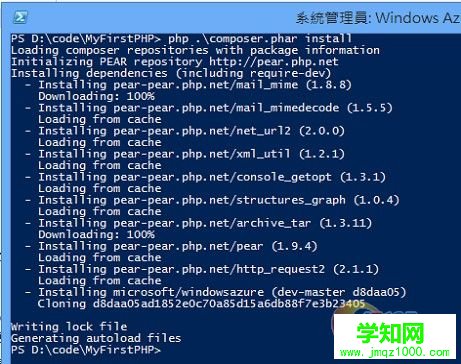
这些Client Library存放在MyFirstPHP/vendor目录下,通常我会把她们搬到WebRole1目录下方便存取,下面是一个使用Windows Azure Storage的例子。
<html><head> <title>Registration</title> <style type="text/css"> h2 div{ width: 100%; margin: 0 auto; background-color:#0d2d80; color:white; } h3 div{ width: 100%; margin: 0 auto; background-color:#e6c671; color:black; } </style> </head><body><h2> <div>Registration</div><h2><form action="accessTableStorage.php" method="post"> <table> <tr> <td>Name:</td> <td><input type="text" name="txtname"/></td> </tr> <tr> <td>Email:</td> <td><input type="text" name="txtmail"/></td> </tr> <td colspan="2"><input type="submit" name="submit" value="add"/></td> </tr> </table></form><h3> <div>List</div><h3><?phprequire_once 'vendor/autoload.php';use WindowsAzure/Common/ServicesBuilder;use WindowsAzure/Common/ServiceException;use WindowsAzure/Table/Models/Entity;use WindowsAzure/Table/Models/EdmType;$connectionString = "DefaultEndpointsProtocol=http;AccountName=<your acount >;AccountKey=<your account key>";$tableRestProxy = ServicesBuilder::getInstance()->createTableService($connectionString);try { // Create table. $tableRestProxy->createTable("customers");}catch(ServiceException $e){ $code = $e->getCode(); if($code != 409) { $error_message = $e->getMessage(); echo $error_message; }}if(isset($_REQUEST['submit'])){ $entity = new Entity(); $entity->setPartitionKey("rec"); $entity->setRowKey($_REQUEST['txtname']); $entity->addProperty("email", null, $_REQUEST['txtmail']); try{ $tableRestProxy->insertEntity("customers", $entity); } catch(ServiceException $e){ // Handle exception based on error codes and messages. // Error codes and messages are here: // http://msdn.microsoft.com/en-us/library/windowsazure/dd179438.aspx $error_message = $e->getMessage(); echo $error_message; } }?><table><tr><td> <b>Name</b> </td><td> <b>EMail</b></td><td></td><?php $filter = "PartitionKey eq 'rec'"; try { $result = $tableRestProxy->queryEntities("customers", $filter); } catch(ServiceException $e){ // Handle exception based on error codes and messages. // Error codes and messages are here: // http://msdn.microsoft.com/en-us/library/windowsazure/dd179438.aspx $code = $e->getCode(); $error_message = $e->getMessage(); echo $code.": ".$error_message."<br />"; } $entities = $result->getEntities(); foreach($entities as $entity){ echo "<tr>"; echo "<td>" . $entity->getRowKey() . "</td>"; echo "<td>" . $entity->getPropertyValue("email") . "</td>"; echo "</tr>"; }?></table></body></html>特别注意一点,这个Client Librarys仅支持PHP 5.3以上版本。
Using Memcache – Windows Azure Caching
如果你的PHP应用程序有使用到Session的话,那么在网站Scaling之后,如何维持Session就是一个很大的问题,在这部分Windows Azure Caching提供了相当完善的支持,PHP应用程序可以透过
Memcache来与Windows Azure Caching沟通,然后把Session导向Windows Azure Caching,这样一来,不管Scaling的Instance数量有多少,都不会影响Session的储存。
要做这个动作也很简单,首先透过Windows Azure Powershell建立一个Cache Role。
PS D:/code/MyFirstPHP> Add-AzureCacheWorkerRole
接着下达启用Cache Role的命令。
PS D:/code/MyFirstPHP> Enable-AzureMemcacheRole webrole1
正常的话会看到以下讯息。
详细信息: Memcache is enabled for role 'webrole1' using cache role 'WorkerRole1' to connect use server name
'localhost_webrole1' with port 11211.
接着请至以下网址下载PHP使用memcache的plug-in。
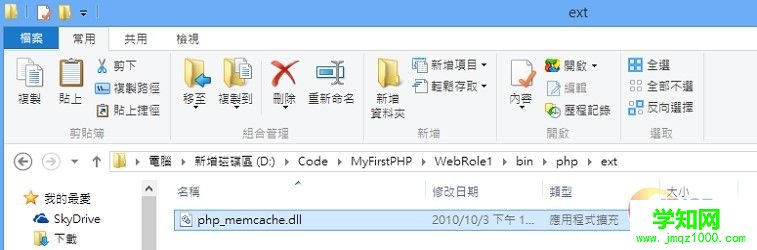
http://downloads.php.net/pierre/php_memcache-2.2.6-5.3-nts-vc9-x86.zip
接着放到MyFirstPHP/WebRole1/bin/php/ext目录下,没有的目录请自行建立。
图11
接着在MyFirstPHP/WebRole1/bin/php目录下建立一个php.ini。
图12

是的,这个php.ini就是常用来调整PHP环境的那个档案,这里我们调整了Session及Memcache的设定。
Php.ini extension=php_memcache.dllsession.save_path=tcp://localhost_WebRole1:11211session.save_handler=memcachePHP编程
郑重声明:本文版权归原作者所有,转载文章仅为传播更多信息之目的,如作者信息标记有误,请第一时间联系我们修改或删除,多谢。
新闻热点


疑难解答